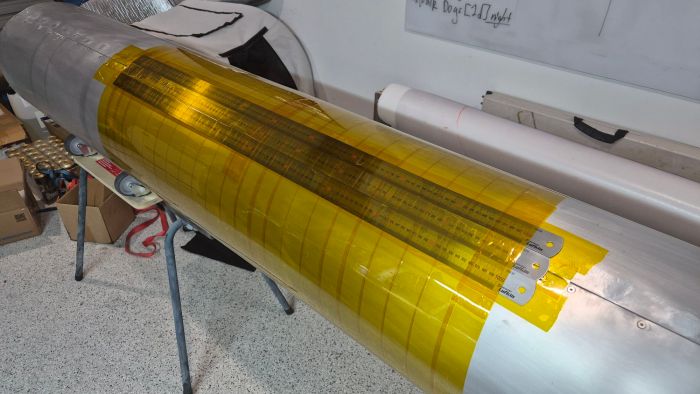
Following our last Grond update, the mould now spins. The next job is to give it something useful to spin: our first carbon-fibre tube. Before getting covered in epoxy, I wanted to review the plan and check what we actually have. Carbon cloth, resin, hardener- and hopefully enough of each to get through the experiment.
The idea is fairly simple:
- Prepare six layers of carbon around Grond.
- Wet them with epoxy in two groups of three.
- Wrap and cure the first 500 mm section, then see whether we can release it.
- If that works, slide it along and add another 1 m in one go, giving us a 1.5 m trial tube with continuous carbon fibres.
- Leave staggered dry ends beyond that, so we can experiment with extending the tube later.
We have used a similar approach in Phase I. This time we are trying it with Grond, a different arrangement of cloth, and a bit more measurement along the way.
How we plan to wrap it
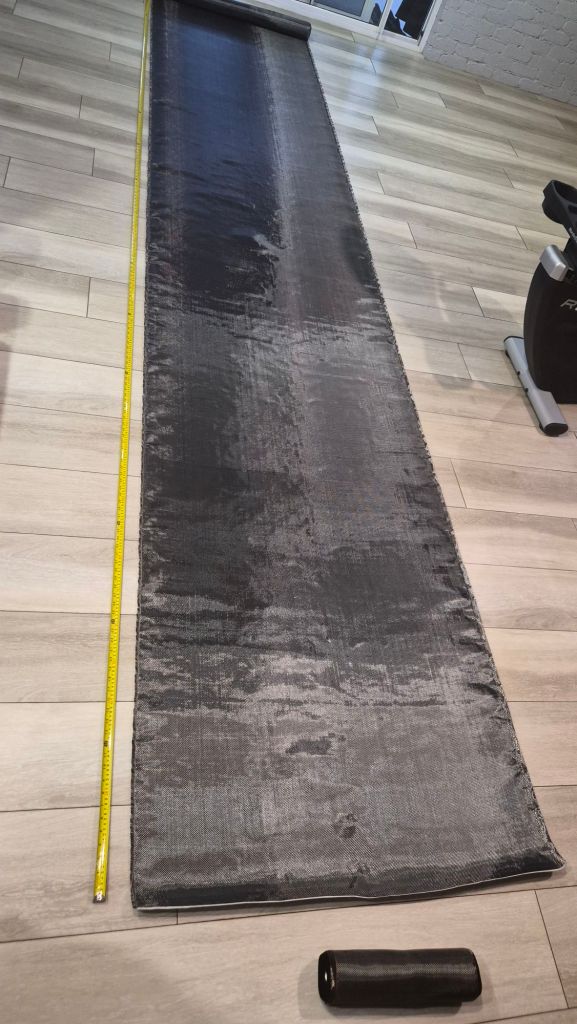
Winding kilometres of narrow tape sounds like a good way to spend a very long weekend(s). So, alongside our original 10 cm tape, I ordered wider cloth to try laying some of the carbon lengthwise.
All three widths are nominally 3K, 200 g/m² woven carbon. Our current six-layer plan, starting at the mould, is:
- Wide cloth lengthwise: a 1 m-wide panel plus a closing strip from the 30 cm cloth.
- 10 cm tape at +45°, covering the whole surface.
- 10 cm tape close-wound clockwise, helping hold the first group together.
- Another lengthwise wide-cloth layer.
- 10 cm tape at −45°, again covering the whole surface.
- 10 cm tape close-wound anticlockwise.
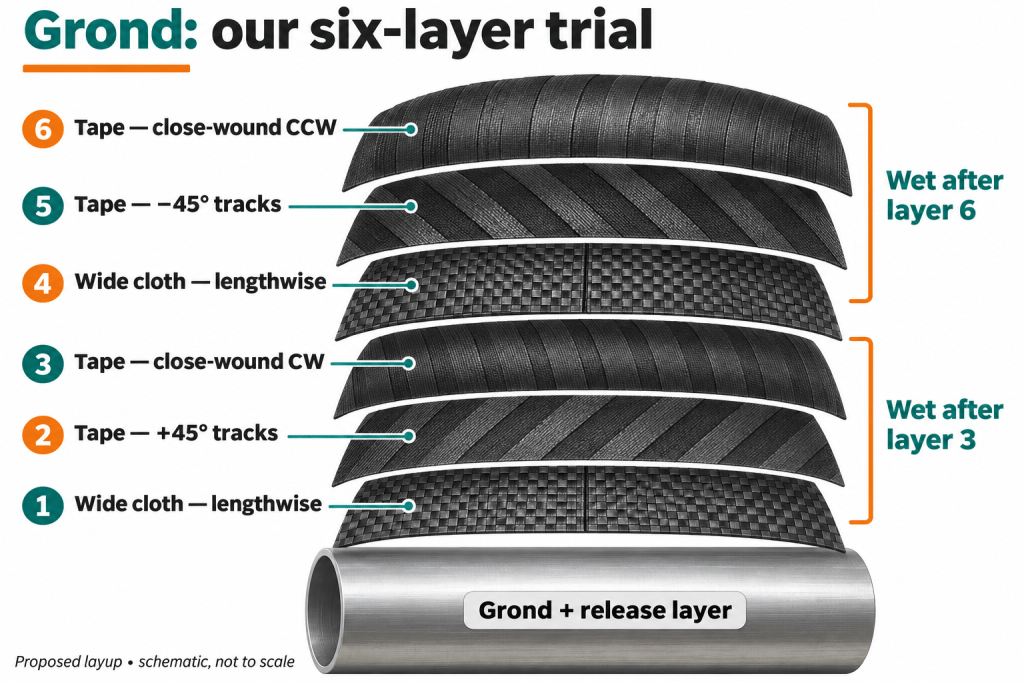
The diagonal layers need several tracks, but we can place them one at a time. No need to become an octopus holding ten rolls at once.
We will rehearse the winding dry first. The wet trial then gets peel ply, an outer compaction wrap and insulation. Our selected cure reference is 12 hours at 100°C, one of the conditions reported for our High Tg hardener in the Gurit datasheet, page 7. We will check the heating setup and measure temperature at the laminate.
The first big question is whether it releases. The next is whether the transition between successive cure zones comes out well. Looking like a tube will be a good start, but it will not answer everything.
A smaller start
The original idea was to prepare enough continuous material for a much longer tube. Then I started unrolling the 1 m-wide cloth to make a 10 m length. That is quite a lot of carbon to have hanging off a rotating mould.
So the first experiment has become smaller: 0.5 m first, then another 1 m if the first run works. We still get to test the transition between two cure runs, without handling the whole future keel at once. The first 1.5 m needs no tape end-joins.
Beyond that, the layers will finish in a staircase. Layer 1, nearest the mould, has a planned 700 mm dry tail; each following layer is 100 mm shorter, down to 200 mm on layer 6. Those tails give us material for a later joining experiment. We have not yet established the overlap needed for a strong joint.
Cutting the material
I measured approximately 1,230 mm around Grond over the Kapton and stainless release strips. The cut plan allows a little more circumference as the layers build up, plus material for the ends and handling.
Here is the cut list we worked from. Lengths are measured along each piece of cloth or tape, rather than along the tube axis.
| Layer | Piece labels | Material | Quantity × planned cut length |
|---|---|---|---|
| 1 – nearest mould | L1-W / L1-S | 1 m cloth / 30 cm cloth | One of each × 2.25 m |
| 2 | L2-B01–B10 | 10 cm tape, +45° tracks | Ten × 3.30 m |
| 3 | L3-H | 10 cm tape, close-wound clockwise | One × 30 m |
| 4 | L4-W / L4-S | 1 m cloth / 30 cm cloth | One of each × 1.95 m |
| 5 | L5-B01–B10 | 10 cm tape, −45° tracks | Ten × 2.90 m |
| 6 – outside | L6-H | 10 cm tape, close-wound anticlockwise | One × 26 m |
That is 26 pieces, using 118 m of narrow tape in total and 4.2 m from each wide roll. The 30 cm closing strips can be trimmed in width after dry-fitting. The long helical pieces each fit within a single stock roll, so the glue-assisted tape-joining experiment can wait until we need an extension.
Cutting is now done. The pieces include the dry tails and handling allowances; they will not all become part of the first cured section.
What the carbon actually weighs
On 18 November I put all the rolls on the scales.
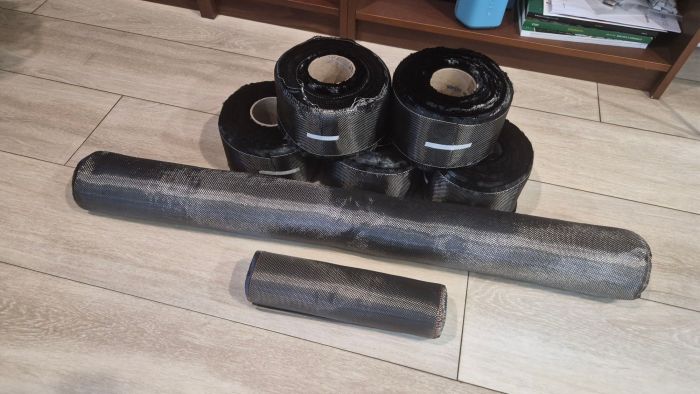
| Roll | Assumed length | Weight, including paper core |
|---|---|---|
| 10 cm tape – roll 1 | 100 m | 2,439 g |
| 10 cm tape – roll 2 | 100 m | 2,462 g |
| 10 cm tape – roll 3 | 100 m | 2,429 g |
| 10 cm tape – roll 4 | 100 m | 2,404 g |
| 10 cm tape – roll 5 | 100 m | 2,380 g |
| 30 cm cloth | 20 m | 1,252 g |
| 1 m cloth | 20 m | 4,150 g |
| Total | 17,516 g |
I have not weighed the empty paper cores, so that is the weight of our stock on the shelf – not 17.5 kg of carbon fibre. The nominal dimensions and fabric weight suggest about 15.2 kg of dry carbon, which we can check more accurately as the rolls are used.
We will keep the empty cores and weigh the offcuts too. It should help us distinguish material in the finished tube from material still on the bench – or in the bin.
The cut pieces on the scales
After cutting, I weighed the pieces as well.
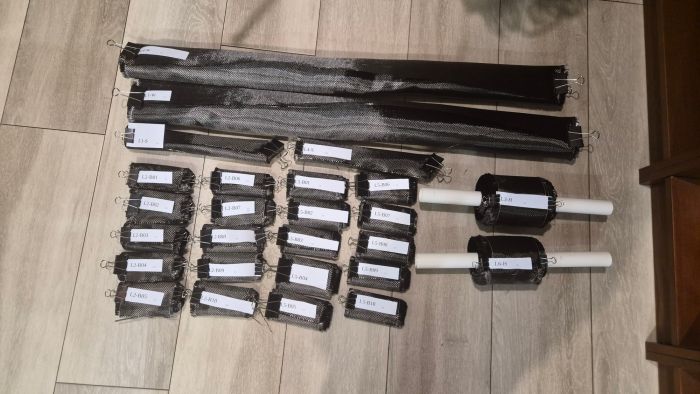
| Piece / layer | Recorded weight |
|---|---|
| L1-W — wide panel | 445 g |
| L1-S — closing strip | 139 g |
| L2 — individual diagonal strips sampled | 78, 77, 77 g |
| L3-H — clockwise winding | 830 g including PVC core |
| L4-W — wide panel | 383 g |
| L4-S — closing strip | 118 g |
| L5 — individual diagonal strips sampled | 69, 68 g |
| L6-H — anticlockwise winding | 742 g including PVC core |
Everything was weighed as bare carbon except the two long winding pieces, which I had re-wrapped onto approximately 4 cm outside-diameter PVC tubes. I still need those tube weights to get the net carbon mass. The diagonal-strip readings above are partial records, so we do not yet have a complete measured weight for the kit.
The wide cloth is within about 3% of its nominal weight. The measured narrow strips are around 17–19% heavier than the 200 g/m² estimate, assuming the planned cut dimensions. That is useful to know before relying too heavily on a calculated tube weight.
Do we have enough epoxy?
Our selected combination is Gurit PRIME 37 resin with PRIME High Tg hardener, mixed 100:25 by weight. In workshop-sized terms, that is 100 g resin plus 25 g hardener. The ratio is specific to this hardener (as per Gurit datasheet, page 7).
For a first estimate, we are assuming the cured laminate will be roughly 60% carbon and 40% resin by mass. That means about 0.67 kg of mixed epoxy per kilogram of dry carbon retained in the tube. So using the nominal fabric weight and our planned overlaps, the 1.5 m tube section works out at about 2.4 kg of carbon and 1.6 kg of retained mixed epoxy.
Resin and hardener on the scales
Today, 19 November, it was also the canisters’ turn.
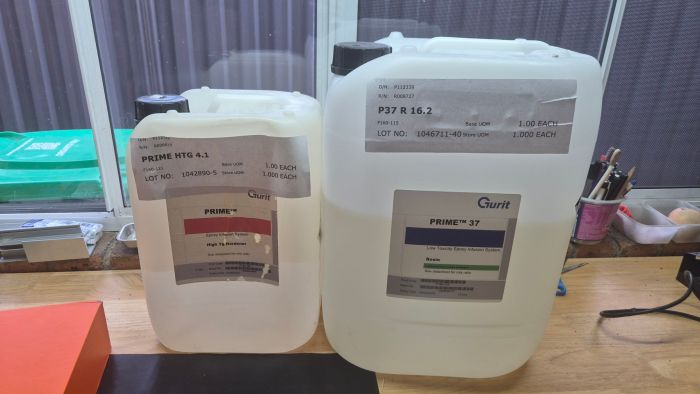
| Material | Measured with packaging | Net contents stated on label |
|---|---|---|
| Epoxy resin | 17.1 kg | 16.1 kg |
| High Tg hardener | 4.5 kg | 4.1 kg |
Using the label quantities, 16.1 kg of resin needs 4.025 kg of hardener. That gives us approximately 20.1 kg of correctly mixed epoxy, with a little hardener left over.
As we work, we will weigh the containers again and compare what we used with the weight and length of the cleaned tube. We will also keep track of the unused dry tails and offcuts. That should give us a much better estimate of consumption and kilograms per metre than the spreadsheet alone.
Next: a dry rehearsal
The material is cut, the first piece weights are recorded, and the resin stock looks sufficient. Next comes a dry winding rehearsal to check coverage, handling and how long the work takes before mixing anything.
Then we can try the first 500 mm: wind, wet, wrap, heat, cool – and find out whether our new tube actually wants to leave Grond. If that goes well, we will check the heating and release setup for the next full metre before continuing. Can’t wait to see it happening!